How to choose a kayak
Outdoor Activities | June 3, 2026
SAIL
May 4, 2022
Share


Most of us have experienced that dreaded feeling of needing a drink on a hot summer hike only to realise that we only have a few measly drops of water left for the remaining journey. When packing for a hike, it’s important to bring enough water for the whole trip, but how do you know what the right amount is? And how should you carry it? Our expert Claude Roussin, SAIL equipment buyer, is here to help.
In this article, you will learn:
As a rule of thumb, take 500ml of water with you for every hour of moderate to intermediate activity. But don’t forget that the altitude, the weather, your body type, age and various other factors could mean you’ll need to drink more to avoid dehydration.
If you are planning a particularly long or strenuous hike, it’s best to bring a good two litres of water. “Remember that water is heavy,” says Claude. “If you think you’ll drink more than two litres, consider planning a route with a few refill points, or bring a water filter along to avoid carrying your entire water supply.”
Another one of Claude’s top tips is to drink small amounts on a regular basis. Don’t wait until you feel thirsty as this means your body is already dehydrated. If you are displaying symptoms of dehydration, start drinking little and often. Avoid chugging down large amounts of water.
What about electrolytes? Whilst long trail runs or very hot weather may warrant the addition of electrolyte tablets or powder to your water to compensate for the minerals lost through sweat, most hikers should be fine with plain old regular water.
So now that you know how much water to carry, the big question remains: how will you carry it? With a plethora of options available, from bottles to packs to vests, it can be hard to pick the right one. Claude recommends first determining your hydration pack’s ideal capacity:
Quantity of water required per activity type
| Quantity | Activity |
| Up to 1L | Shorter walks or hikes |
| 2L to 2.5L | Longer or strenuous hikes Multi-day hikes with identified refill points |
| 3L | Longer hikes without any refill point Exploring new terrain potentially without access to water |
Have a look at our hiking guide for additional information on all things hiking.
Most of us have a couple of water bottles stashed somewhere, so this option requires little investment. Water bottles can be carried in a backpack with the rest of your gear, but they do require a stop mid-hike in order to get a few sips, which most of us are guilty of not doing very often. If using water bottles, set a timer on your watch so you remember to hydrate every 20 minutes. Keep water bottles in the side pockets of your backpack as they will remain cooler than if thrown in your backpack, pressed on your back. Hydro Flask and Nalgene products are classics on the hiking trail.
If you are thinking of purchasing a new water bottle, consider an insulated one to keep your water cold for longer, or a collapsible plastic one, which weighs much less and can be squished when empty.
Waist packs are a great way to carry water without ending up with the usual “sweaty backpack back”. They also free your hands should you need to use poles, either whilst walking or skiing. Waist packs are designed to fit snugly around your waist and feature compartments for either one or two small water bottles, as well as a couple of extra pockets for items such as snacks, keys or a phone, but not much else. As the quantity of water they can carry is limited, waist packs aren’t suitable for long hikes. They are best used for shorter walks, cross-country skiing or Nordic walking.
With hiking hydration packs, water is kept close by at all times and hikers do not need to stop to take a sip.This water system comes in a variety of models, each adapted to a particular sport such as cycling, mountain biking or hiking. When it comes to hiking packs, there are two options to consider: you can purchase a full packback, or go for the reservoir only.
Reservoirs (commonly known as bladders) can be carried in whichever backpack you choose to use, which gives you a bit more flexibility. Pick a smaller daypack for shorter hikes and add your reservoir to the interior compartment, or transfer it to your expedition pack for longer backpacking outings. Brand Camelback is a staple when it comes to hydration packs.
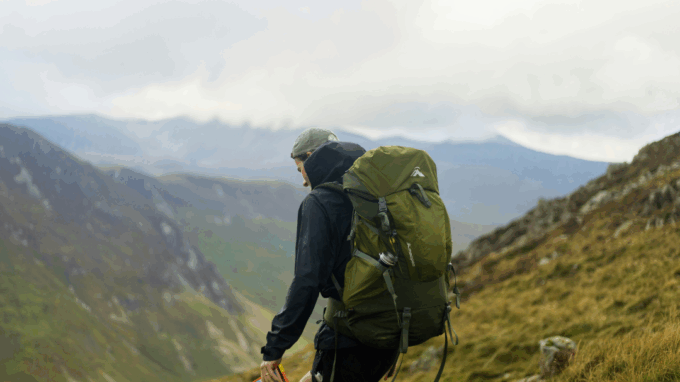
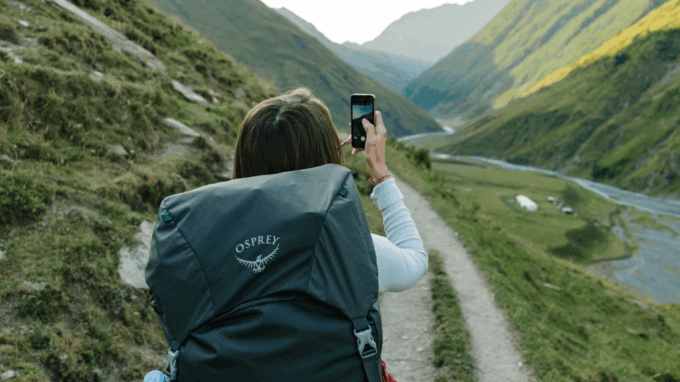
Hiking hydration backpacks on the other hand come with a reservoir and some storage for gear and snacks. They are similar to a standard hiking backpack, but are better adapted to the shape of the bladder. This means your reservoir is kept upright, doesn’t move around your pack or collapse on itself. Sizes vary, from the ultrathin hydration pack used by minimalist hikers to bigger ones which permit you to carry extra layers, food and other hiking essentials (read our hiking gear essentials checklist here). It’s worth selecting a size that will fit your particular hiking needs. Brand Osprey offers a good variety of sizes to suit most types of activities.
Look for a pack with a shoulder clip so your tube stays fixed in the right place while you walk. Some hydration packs also come with a lock valve, which prevents leaks.
These are made specifically for the running community. Ultralight hydration vests either feature a reservoir at the back or soft flasks at the front (or both). They aren’t designed to carry huge quantities of water, and only feature a few small pockets big enough for energy gels. What makes them different from hydration packs? They are form-fitting and designed to keep everything close to your body, which minimises bounce and stops water from sloshing around. A great option for trail or long-distance runners.
There may come a point when you need more water than you can physically carry, in which case water filters should be considered. The Lifestraw water bottle, for example, has an integrated filtration system, which means you can safely refill at just about any water point. The various components of the filtration system (such as the carbon capsule or the actual filter) can be separately replaced, which considerably extends the lifetime duration of your water filtration system.
We won’t bore you with tips on how to clean your water bottles, as a little dish soap (or some effervescent cleaning tablets) and a brush will do the trick. But hydration reservoirs? These are a little trickier. Claude recommends rinsing and drying your entire hydration system (reservoir, tube, valves) as much as possible between each use. If you are using it a lot, a good clean may be in order. Pop a couple of cleaning tablets in the reservoir and use a set of brushes to give it a good wash. Your set should include a reservoir cleaning brush, a tube brush and a drying rack as a minimum, although you can just about use any kitchen implement (such as a whisk) to keep it upright and open while drying.