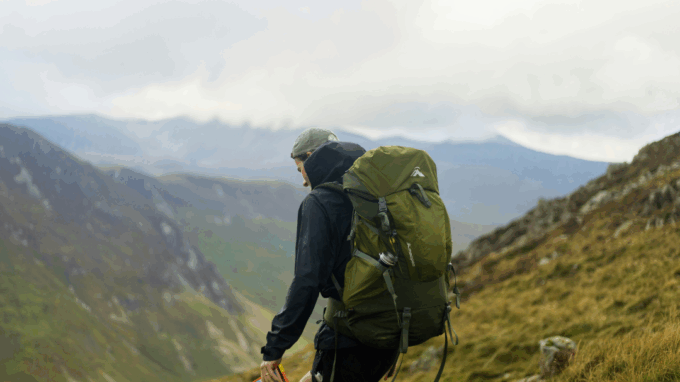
How to choose a kayak
Outdoor Activities | June 3, 2026
SAIL
November 17, 2021
Share


Cross-country ski waxing is not as complicated as it sounds. Eli Plante, former elite athlete and cross-country ski coach for the past 10 years, reveals her tips on how to wax cross country skis that will allow you to optimize your outings and maximize your performance.
Article written by Eli Plante, former elite athlete and cross-country ski coach for 10 years.
Cross-country skier and coach Eli Plante shares her tips for waxing skis:
Don’t be afraid to learn how to wax cross-country skis, it’s quite simple: just read the products carefully and ask questions if you don’t understand. Familiarize yourself with cross-country skis and the different types of waxes by shopping online at SAIL.ca or visit our store to share your questions with our on-site advisors who will be happy to help you.
Please note: only the waxing of classic cross-country skis will be discussed in this article. The waxing of skate skis, which are distinguished by shorter and curved skis requiring side strides (which can be similar to ice skating) will not be covered.
Are you wondering how to properly wax your cross-country skis? This seemingly laborious and complicated process is easy to do once it is explained and clarified.
Basically, waxing is the application of different waxes on your cross-country skis. A good waxing will allow you to glide better and stick to the snow, therefore to advance more efficiently in your alternate step.
The alternating step is the most known and practiced movement in the world of cross-country skiing. It is the alternation between pushing and propelling in the snow, and sliding on it. It is also the alternation between the advancement of the leg and the arm that allows the skier to push and slide properly.
Waxing is a compromise between glide and grip. Some skiers prefer to apply a lot of grip wax (also called holding wax or hook wax) to better grip the snow during climbs and to perfect their alternate step, while others prefer to rely on glide wax.
The movement of classic cross-country skiing resembles a gliding step. It is the most practiced and natural style and the one we think of when we think of cross-country skiing, hence the name “classic”.
In the classic style, it is possible to use three types of skis. Note that not all types of classic cross-country skis require waxing.
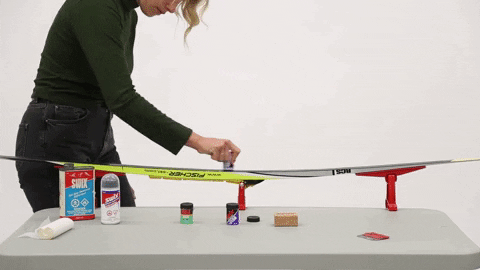
Before you start waxing your skis, it is essential to understand the relationship between the snow and all that characterizes it, as well as the waxes associated and adapted to it.Waxes have different compositions adapted to different weather conditions.
Choose the appropriate wax according to the snow and the outside temperature. The colder the temperature, the harder the wax. Conversely, the warmer the temperature, the softer the wax. Follow the snow temperature recommendations on each wax product.
The underside of a cross-country ski, called the base, is distinguished by three zones: two glide zones at the front and back of the ski and the wax zone, also known as the grip zone, wax pocket, holding zone or wax chamber, located under the binding.
This grip zone generally extends from the front of the boot to the back of the heel and measures 20 to 30 centimeters. Its length varies depending on the ski’s camber and the skier’s weight. It is this area and the wax on it that allows forward propulsion and gliding on the snow.
Beginner skiers should choose skis that grip the snow. Their skis will therefore receive more layers of wax and will often have a longer waxing zone.
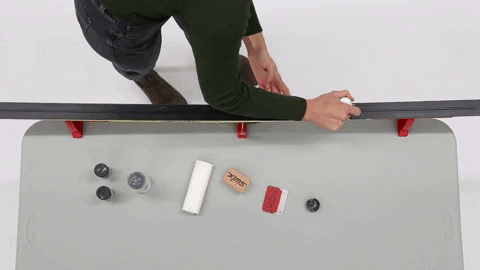
It is possible to mix the waxes when applying them, but always put on the hardest wax first.
Apply a thin first coat of your hardest wax to the wax area.
Between each layer of wax, rub the cork so that the wax can penetrate the sole of the cross-country ski. Repeat the wax and cork process at least three times.
You can choose between a natural or synthetic (more commonly used) cork block.
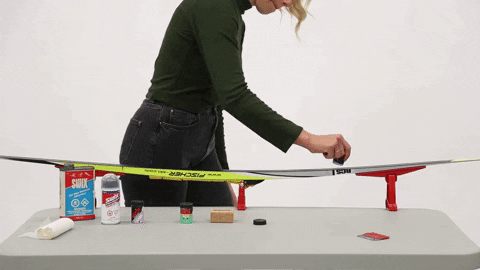
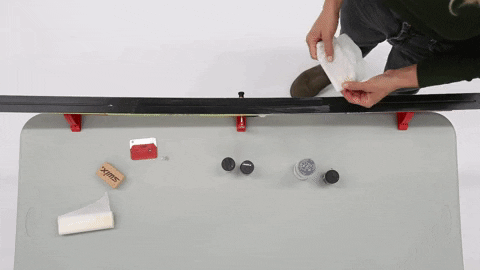
You can apply other waxes depending on snow conditions and temperature.
Apply a number of coats proportional to the number of kilometers you plan to ski. The longer you plan to ski, the more layers you need. For example, apply one layer per 5 km, so 3 layers for a 15 km ride.
If you have used a klister wax, leave your skis outside for about 10 minutes to allow the klister to harden.
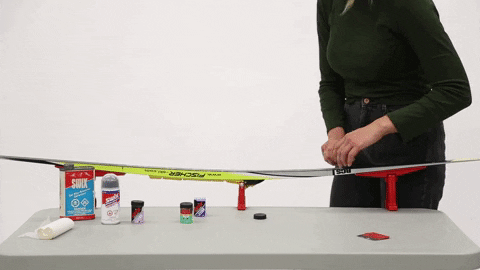
This step is more complex and is very different from waxing; a scraper and brushes are required.
After applying your layers of wax and running the cork between each layer, it’s time to go test your skis.
Test your skis on a climb or without the use of your poles. This will allow you to see how well you grip the snow. You may need to add one or more layers of wax. You may also need to remove some wax if you are sticking to the snow too much.
Remember to take wax with you on your outings for reapplication along the way to optimize your ride.
After an outing, it is important to clean the base of your skis. It is especially important to clean the base if you are going from soft to hard wax.
This will prevent you from sticking to the carpets in your car, your gloves or your clothes.
Thanks to the tips provided by Eli Plante, you are now well prepared to take on the task of waxing your cross-country skis. All you need to do is get the right products for your level, preferences and skiing conditions. Take a look at the products made by Swix, a brand with over 70 years of experience in the manufacture of waxes. The company offers basic waxes, several types of grip and gliding waxes, cleaners and all the tools you need to care for your skis (scrapers, brushes, corks, wipes and more).
Share